Written by Gordon Harvey on Jul 12, 2016 |
Coaching
Miscellany & Merriment
Music & Technology
Written by Gordon Harvey on Jul 12, 2016 |
Coaching
Miscellany & Merriment
Music & Technology

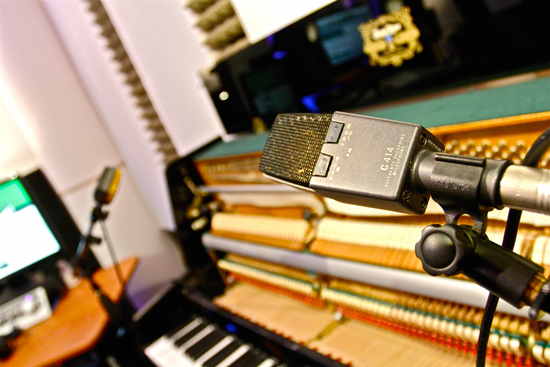
Credit: http://www.intuneaudio.ca/
In the last two articles, we talked about the benefits of recording yourself and what to listen for when reviewing your recorded efforts. In this installment, we’ll discuss some practicalities of making recordings. Even if you’re simply making a cheap and cheerful recording for the purposes of self-review, a few snippets of advice will help you make sure it’s something you can actually hear. Or if you’d like to make a better-quality recording for posterity, you can often do so at home with reasonably basic gear and a little preparation.
The below advice is directed toward piano in particular, but you should be able to adapt most of it to any other instrument.
Simple audio recording
 Nowadays, basic recording is as simple and available as photography, thanks to the smartphone and tablet. For example, built into Apple’s iOS is an app called Voice Memos. Using it is a matter of tapping the Record button. You can save your recording to iTunes for playback on a better-sounding device, but listening on your earbuds will likely be enough to hear yourself pretty satisfactorily. If you want to go a step further, Apple makes a free app called Music Memos. This is like Voice Memos’ bigger brother, saving your files in a better-quality format, and offering other handy features, including the ability (depending on the source) to listen to the notes and tell you what chords you’re playing. This makes it a valuable composition tool, and, beyond that, allows you to open your recording in GarageBand for further development.
Even with this basic way of recording, you’ll need to observe a few pointers to make sure the sound is acceptable. It’s tempting just to pop your phone on top of the piano, but this will often result in a distorted sound as the microphone is overloaded. On the other hand, place the device too far away and the sound will be indistinct and echoey. Experiment a little for the best balance. I find it good to place my recorder on a chair next to the piano bench.
If you have an electronic keyboard, it should have an audio output that you can plug into your device. Your device should automatically recognise the input and switch off the mic. If it doesn’t, you may need an adaptor to plug into your charger connection. For day-to-day recording, though, maybe the built-in mic would suffice.
A computer will give you similar results, and a simple adaptor can allow you to plug in an external mic or instrument.
Better quality audio recording
 To make a recording good enough to show the world, you may need a few extra tools. What you choose will mostly depend on just how high-quality you want to go.
A dedicated portable recorder combines good mics with pocket-size convenience. You record on the device and export the resulting file to your computer or other device for playback and editing. Many of them can also be used to record direct to your computer via USB. Choose a stereo recorder for best use on a piano.
There are some great-quality microphones designed for digital connection to your phone, tablet or computer. Typically, these will plug into USB or your phone/tablet’s digital connector. The Blue Yeti for computers and the Mikey for iOS are great-sounding, affordable stereo mics. Some digital mics allow you to choose different modes, which determine from which direction they pick up sound. For example, a cardioid pattern will mostly focus on sounds directly in front of the mic, while omnidirectional hears equally from all directions. Patterns like omnidirectional will pick up more sounds from around the room, which you probably won’t want. If the mic has a stereo mode, it will most likely be best for piano.
More traditional microphones may be the best choice for the most uncompromising needs, although your wallet may need to be equally uncompromised. These mics will also require an interface to connect them to your device. Some mics require ‘phantom power’, power supplied via the interface. An advantage of traditional mics compared with typical USB versions is that the stereo pair in a USB mic is fixed – you can’t position each channel separately. With separate mics you have more placement choices. But note that not all traditional mics are top-quality – a good USB unit will probably give better results than cheap traditional mics.
Credit: http://www.pro-tools-expert.com/
Once you have your mic, you can’t just plonk it down anywhere in your living room and get going. It’s important to experiment with placement. The best location for your mics will depend on the room acoustics, amount of background noise, the nature of your instrument and the kind of sound you want to capture. To start with, try putting the mics close to the instrument. This will give you the loudest signal from the piano and the most ‘presence’, and proportionately less extraneous background noise. However it will increase the risk of distortion and will pick up more noise from the piano’s mechanism, like the clunk of the sustain pedal and other clicks and creaks.
On the other hand, further away from the piano will pick up more noise from the room, including sounds from outside and reverberation from around the room. You may not be aware of these reverberations until you hear the recording but, depending on the room, they can make the piano sound like it’s inside a chamber or strangely disembodied. They are caused by the sound bouncing off hard surfaces and ricocheting around the room, but they are absorbed by other elements like soft furniture. Recording studios are carefully designed to manage this effect, but you might make your space acceptable enough (and reduce the intrusion of unwanted outside noises) just by closing curtains and perhaps putting spare rugs or blankets on the floor. And, again depending on the effect you’re after, you might decide that a little of that ‘live’ sound is desirable.
Those unwanted outside noises, like traffic, birds, children playing or the TV, are hard to eliminate, but you might find a time when they are minimal, most likely at night. You should also pick a time for your session when there are few other distractions. Perhaps find a time when the rest of the family is out, and you can feel comfortable and unhurried.
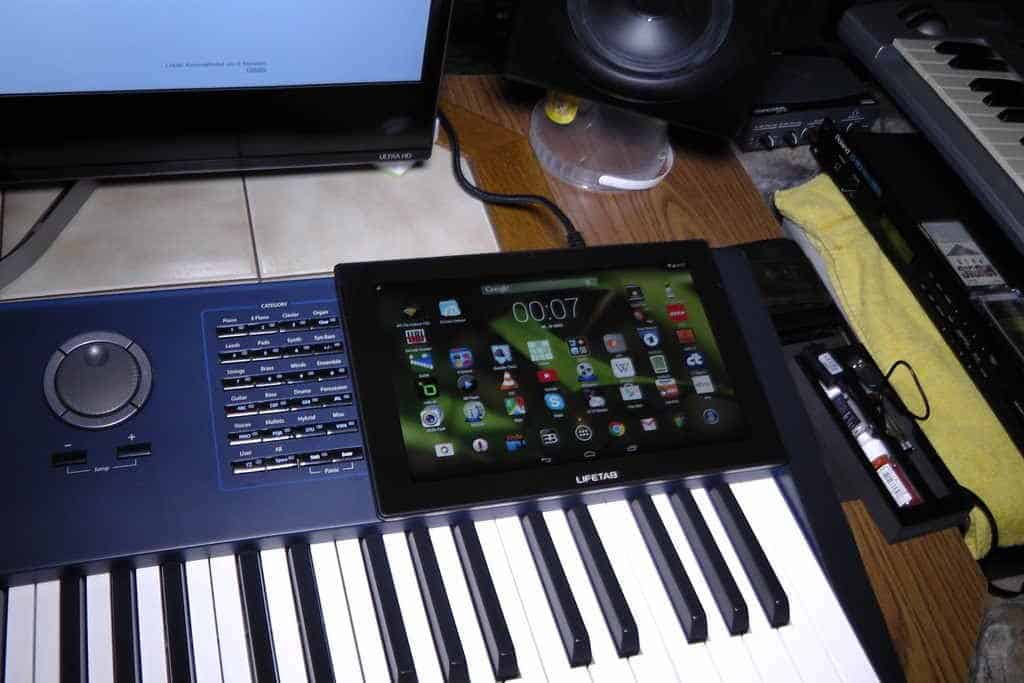
If you have an electronic instrument, most of the same rules apply, but if have the option of plugging it direct into the computer, you will eliminate acoustic problems. Another option with these instruments is, if you have a MIDI or USB connection, you might be able to use it as a controller in a workstation program such as Garage Band. In this setting, rather than using the keyboard’s own sounds, you can use it to trigger a better-quality software piano sound (or any other sound for that matter).
Credit: productionforums.com
Such a program (correctly called a Digital Audio Workstation or DAW) can be used with any of your recordings to add final tweaks to your sound, like EQ, compression and reverb (yes, I know we just spread blankets everywhere to reduce the reverb, but when you add it later, you have control over it). If you have recorded multiple takes, you can, within reason, cut and paste together the best bits of each take for the most polished result possible. You could look at this as cheating, but if what you want is the best-sounding music rather than an accurate representation of your skills, it’s worth considering. Trust me – the pros do it all the time.
Video recording
It’s so easy nowadays to video yourself with a phone or tablet. As I mentioned in the first instalment of this series, it can be really beneficial to show your video to your teacher for advice about how you work at your instrument at home. If you do, make sure you film from a little distance away so they can see how you sit, how far away you are from the instrument, and so on. If your camera is positioned at at least standing height, and a little behind you, the teacher can see your hands at the keyboards. It’s best to film in landscape format.
For a sound quality a cut above the camera’s microphone, many of the above strategies will work with the right external mic connections.
Of course if you’re happy with your work you can also share it on an audio sharing site like Soundcloud, or YouTube if it’s on video. If you have a clip you’re especially proud of, email me at gharvey@sandbox.simplymusic.com with a link and we may showcase it on our YouTube channel or Facebook page.